The essential checklist for every open source repository maintainer

open source repo maintainer checklist

The process of turning a repository into an open source project that can accept contributors from the public takes some careful planning. There are some items that ideally should be included in every repository to help keep it under control.

We’ll go through basic items every open source repository should have before making it public. Create a checklist of these items for every repository you plan to launch or update your existing ones if any items are missing. 

In my experience so far of maintaining the open source repositories on the inspirezone GitHub page I found having each of these checklist items in place extremely useful. Checking these items off for each repository will certainly make the process of maintaining easier for you!

This should be useful for anyone thinking of launching an open source repository or if you want way of managing your existing ones more efficiently.

1. Add a README file

A README.md file placed at the root folder is the minimum form of documentation essential for every repository. Hinted by its name, a readme file contains information that should be read by anyone viewing the repo. The contents of a readme should contain details such as:

  • Description of what the repo is about
  • Technologies, libraries and frameworks used
  • How to install and use the contents of the repo
  • The current state of the repo
  • Any other essential info you want the reader to know

The readme file is the first item on this checklist for a reason; it’s probably the most important form of documentation for any repo. If you don’t have any other items on this checklist, make sure you at least have this one!

2. Add a CONTRIBUTING file

A CONTRIBUTING.md file is another form of documentation. It’s different from a readme because a contributing file instead details all necessary information needed for anyone who wants to contribute to the repo.

Since it’s all about how to contribute to the repo, the file should have details such as:

  • What kind of contributions you accept e.g. bug fixes, enhancements, documentation updates etc…
  • Instructions for submitting a contribution e.g. by submitting a pull request
  • Guidelines for code submitted e.g. linting rules, file naming, variable naming conventions etc…
  • Any other instructions or guidelines you want a contributor to follow

This is the file where you can really get down to the level of detail on exactly what rules should be followed. I would say the contributing file probably sets the standard of how people will view your repo. 

If you don’t have a contributing file it’s really anything goes, and you will have nothing to reference if someone submits a pull request that’s not up to standard.

However, if you’ve detailed clear contributing instructions, you can always point to the contributing file if anyone submits anything not up to standard. GitHub will even prompt users to read the contributing file when they are visiting pages of the repo that indicates they might want to contribute.

open source repo contributing
GitHub will point visitors to your contributing guidelines

Keep in mind, some people who wish to contribute may be beginners to open source and GitHub. So make sure the instructions are clear enough to detail what needs to be done.

Related: See our post on a beginner friendly guide to making your first open source contribution.

The contributing file is probably the second most important after the readme file. So don’t be afraid to lay down rules and details to set the standard for contributions which will help keep the repo in order.

3. Add a LICENSE file

An example license file of a repo.

To be clear of the licensing terms of your repository simply add a file called LICENSE. Most open source repositories will use a license allowing anyone to use and modify the contents of the repo as they wish. 

If you want to give people freedom to do what they please then a license such as MIT should do, which is what I like to use for my repos. 

However, if you want to place some restrictions on what others can do with your code be sure to do your research and place the appropriate licensing terms. GitHub has a number of license templates you can easily add to your repo. For more information see the GitHub docs on licensing a repository.

4. Configure Issues templates

‘Issues’ is a section in every GitHub repository that acts like a project board for any task or discussion relating to that repository. Anyone can submit an Issue to the repo. Common Issues created on repos can include: reporting a bug, suggesting an enhancement or asking a question regarding the repo.

The Issues board is a great way to track all the pieces of work and suggestions relating to the repository. It can also get out of hand if not managed well!

The best way to keep things under control is to force anyone creating an Issue to use Issue templates. See GitHub docs on Issue templates guidelines on how to create these templates. Also feel free to use the Issue templates used by any of our own Inspirezone GitHub repos.

open source repo creating issue
Creating an Issue on an open source repo. If you have templates setup, the contributor will be asked to use one of the templates provided.

Issue templates provide a set format for contributors to use when they click the create Issue button on the repo. You can also set multiple Issue templates so the appropriate template can be selected depending on the type of Issue being reported. Templates also allow you to perform automated actions depending on what Issue is created. For example, if a bug Issue is reported you can automatically assign it to someone.

The advantage of using templates will allow you to control the types of Issues that can be submitted and request for specific information when anyone is creating an Issue.

For example, you can make sure bugs reported will detail information you need for debugging purposes such as: the device OS, software version, steps to reproduce etc…

Having Issue templates set in place is one way to ensure the Issues board in the repo is easier to scan and filter, also making your job of maintaining the repo simpler!

5. Configure Pull request templates

Working in a similar way to Issue templates, Pull request templates lets you set a defined template to be filled out when creating a pull request. See the GitHub docs on Pull request templates guidelines for how to create them.

Having a pull request template in place is a way to ensure the contributor is following the guidelines listed in the contributing file. As a rough guideline you can use the pull request template to ask the contributor to confirm they’ve completed some basic checks. For example you can ask for confirmation that they’ve read the relevant repo docs or for confirmation their submitted code follows the guidelines listed in the contributing file. 

Below is an example of the pull request template used in one of the Inspirezone GitHub repositories. You are also free to use this template if you wish by copying the pull_request_template.md file from any of our repos into yours.

open source repo pr template
Example of an open source repo pull request template

6. Use Labels

GitHub Labels allow you to create categories for Issues and pull requests. Applying labels allows easier scanning and filtering of Issues and pull requests by providing some visual aid. 

Labels are an important tool you should use to keep your Issue project boards and pull requests tidy. They are also very simple to use so there’s no excuse not to use them!

Every repo has a label section to view and manage current labels. GitHub provides a set of labels by default you can use, or if they don’t suit, you can create new labels.

open source repo labels
As a guideline GitHub provides a set of already created labels. You can also create your own labels

To add a label to an Issue/pull request, on the right panel of the Issue/pull request click ‘Labels’ and apply the relevant one. You can also assign more than one label to an Issue/pull request.

open source repo adding labels
Adding a label to an Issue

The concept of labels is simple to use and keeps Issues and pull requests tidier and easier to maintain. So make sure you use them!

7. Implement GitHub Actions with Workflows

The GitHub docs describes GitHub Actions as a way to automate, customise and execute your software development workflow.

Having GitHub Actions in your repository is the most powerful way to maintain contributions as it can be done in an automated manner. If you’re new to it, setting up GitHub Actions properly probably takes the most work out of all the items on this checklist. However, this side of repo maintenance should not be ignored!

It’s a good idea to become familiar with GitHub Actions and how they work with your workflow by reading through the official Github documentation on this topic.

As a basic introduction, GitHub Actions allows you to execute tasks within your repository based on certain events. Each event triggers a workflow, which is a set of instructions and jobs to run. GitHub runs workflows by finding them under a directory in your repository called .github/workflows/. Workflow files use the YAML syntax structure.

GitHub Actions are very powerful because if set up properly, you can avoid manual checks of every update made to your repository. You can also execute Actions on runners, which are virtual environments acting as a server for you to run code on. It’s basically GitHub providing a virtual machine at your disposal!

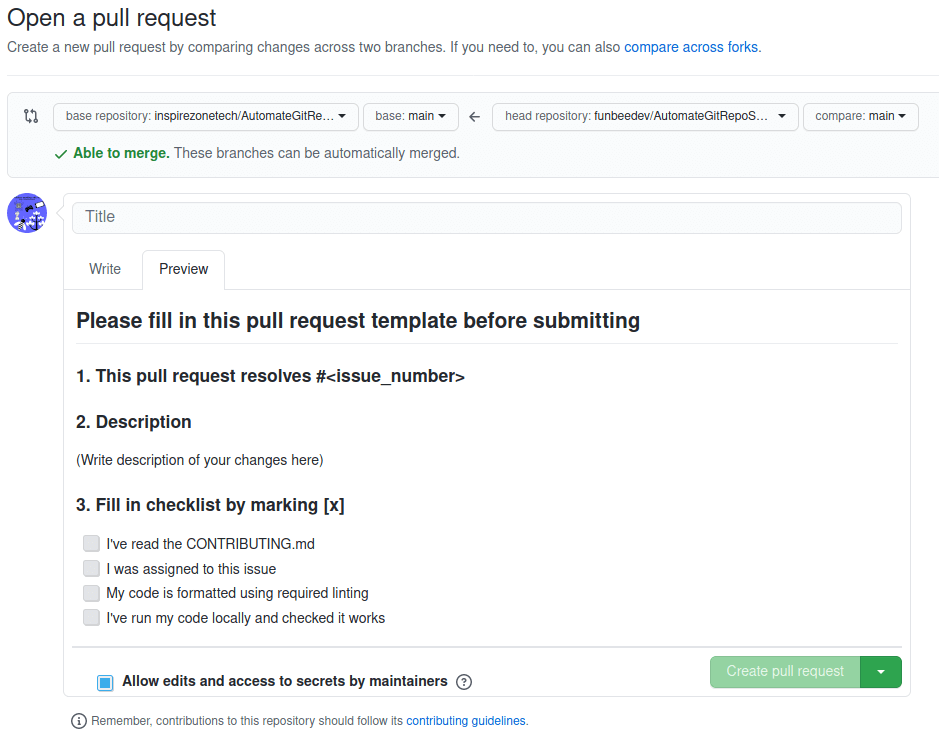
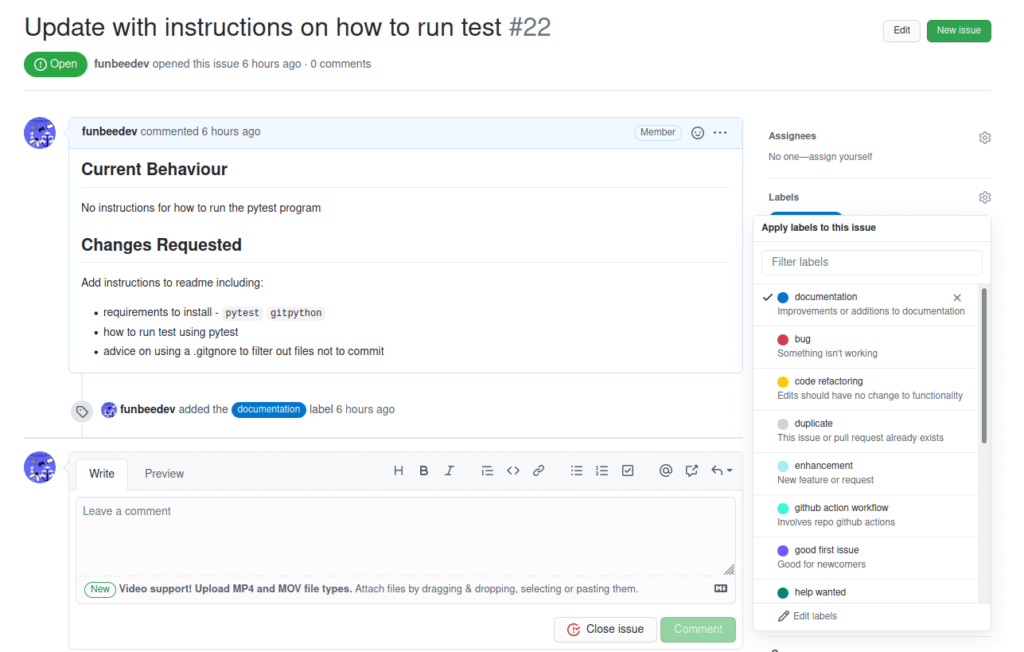
As an example, let’s say you want a way of performing basic code validation checks when someone submits a pull request to your repo. You want to do 2 things when a pull request is submitted:

  • Check the linting of the code
  • Check the code will execute with no errors

This can be done with GitHub Actions by having an action that will trigger on any pull request submitted. When someone submits a pull request to your repository, the action will be triggered and can be used to carry out linting checks or to run the code within the GitHub virtual machine runner.

Now when anyone submits a pull request the code can be automatically checked for these things. If any action fails, the contributor will be alerted of this.

open source repo workflow
Example of the results of a GitHub action workflow to check a submitted pull request

There are many ways to get started with GitHub actions either by creating your own workflows or using existing workflows as a template. I highly recommend you browse through the GitHub action marketplace which contains a variety of workflow templates available for anyone to use. By looking through existing workflows you can develop ideas for automated tasks and checks you want to run on your own repo.

If you’re new to GitHub actions it will take some work to learn how to use them properly. But the time spent setting it up initially is worth time saved in the future through the power of automation!

The repositories I maintain on the Inspirezone GitHub use actions with linting checks, code execution checks and other workflow types which you are free to copy and adapt to your own needs!

8. Setup GitHub repository description and settings

This is a simple but essential item to check of your to-do list before making your repo live. 

This involves updating the About description of your repo and adding relevant topic tags to the repo.

open source repo about section
Example of the About section in a repo. Make sure to fill this in!

The About section will provide a preview of what your repo is about when people come across it in search results. The section to add a URL can be used to link to your website or any website relevant to your repo. The topic tags allow anyone searching for these tags to find your repo. 

Under the repo settings also make sure to set and check everything is ready to go. Your repo name should describe what it does as best as you can. Also add a social image under the settings and make sure the repository is set to public when it’s ready to go live.

While these are small details, it’s important to mention this as many repos will leave the optional fields empty. So make sure you fill them in so people can know what your repo is about and actually find it from search filters!

Conclusion

Maintaining an open source repository is no easy task. It takes some planning and the ability to set rules anyone can easily follow to ensure the repo is kept tidy and maintainable at all times. 

It’s essential you have basic items in place for any open source repository you want to maintain. Otherwise, it may become difficult to maintain as the project scales and you have more contributors.

The job of maintenance should be made easier by having a checklist of these items and checking each off before making your repository public.

Do you maintain open source repositories? Share them in the comments below. Also suggest some of your own tips for maintaining them!

See other articles you may be interested in below: