
This Gatsby Google Analytics guide will take you through step by step on how to get Analytics 4.0 running on your GatsbyJS website using the Gtag plugin.
This Gatsby Google Analytics setup covers all essential steps including: creating your Google Analytics account, obtaining your measurement ID, installing and configuring the Gatsby Gtag plugin and testing the integration live on your website.
There’s also an optional step covering how to configure environment variables on your Gatsby website to hide your unique Google Analytics measurement ID.
1. Create a Google Analytics 4.0 account and property
You’ll need a Google Analytics account if you don’t have one already.
Head over to https://analytics.google.com and follow the setup to create your Google Analytics account.

During the account creation you’ll be guided on setting up a Google Analytics 4 property.
Refer to the Google support page on how to create an Analytics account if you need detailed instructions on account and property setup.
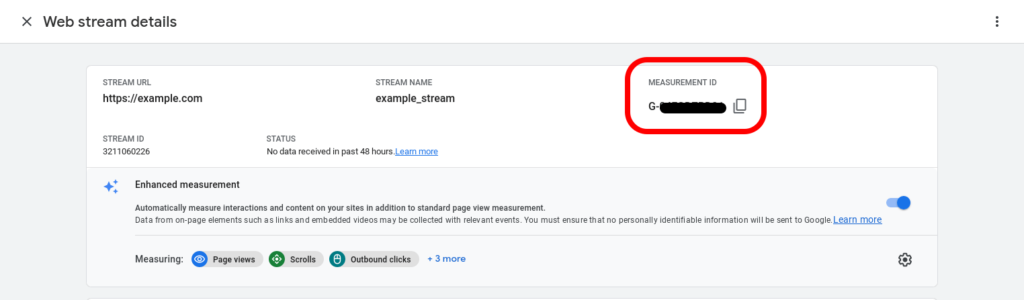
2. Generate a measurement ID
To start collecting data from your website you’ll need a measuring ID. The measuring ID is in the form “G-” ID. For example: “G-ABCDEFGHIJ”
This is a unique identifier for your website’s property generated by Google Analytics to link to your website for data collection.
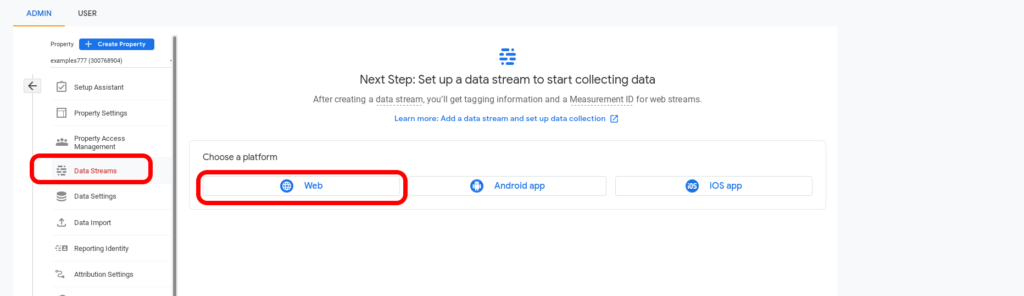
Once logged into your analytics account acquire the measuring ID for the property you created first by adding a website data stream to your property.
Click on your property then select Data Stream followed by the Web option.
Enter the URL of your website and a stream name in the fields provided. Then select Create Stream.
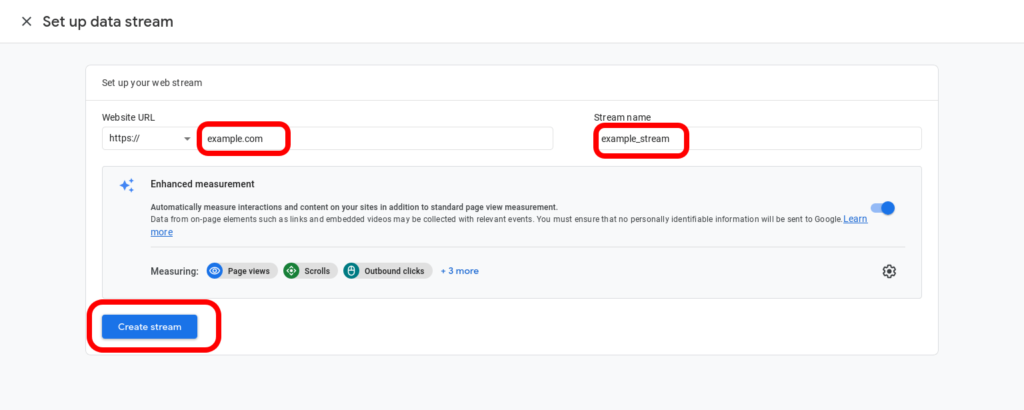
Your web steam will be created and your measurement ID has now been created.
(Refer to the Google support page for further information if you get stuck)
Now that you have the measurement ID we need to add this to our Gatsby website to link it to Google Analytics.
3. Install Gatsby Google Analytics plugin Gtag
Gatsby provides a plugin called gatsby-plugin-google-gtag to ease the process of adding Google Analytics to your website.
On your Gatsby website development environment install the plugin by running the following command.
npm install gatsby-plugin-google-gtag
Your package.json file will update after the installation to include the plugin. For example:
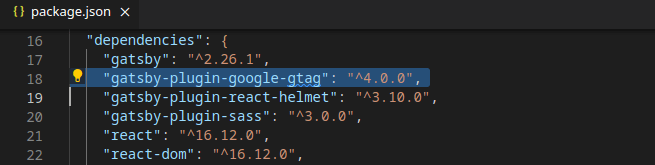
(version number may differ depending on when you installed the plugin)
4. Configure options for Gatsby Google Analytics plugin Gtag
According to the plugin instructions for the we need to configure options in your gatsby-config.js file.
Refer to the plugin instructions for gatsby-plugin-google-gtag for a complete list of options to suit your website configurations.
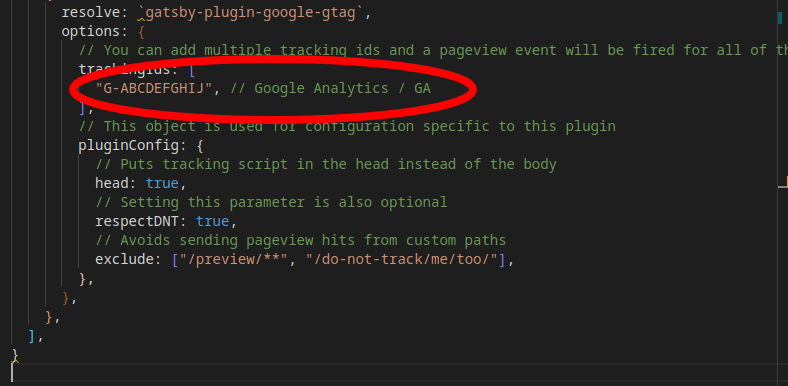
As an example, you may copy the following configuration options to your gatsby-config.js file. Make sure to replace the sample measurement ID “G-ABCDEFGHIJ” with your own unique measurement ID as obtained in step 2.
module.exports = {
 plugins: [
   // Insert other plugins here
   {
     resolve: `gatsby-plugin-google-gtag`,
     options: {
       // You can add multiple tracking ids and a pageview event will be fired for all of them.
       trackingIds: [
         "G-ABCDEFGHIJ", // Google Analytics / GA
       ],
       // This object is used for configuration specific to this plugin
       pluginConfig: {
         // Puts tracking script in the head instead of the body
         head: true,
         // Setting this parameter is also optional
         respectDNT: true,
         // Avoids sending pageview hits from custom paths
         exclude: ["/preview/**", "/do-not-track/me/too/"],
       },
     },
   },
 ],
}
5. Build and serve website to test Gatsby Google Analytics website data
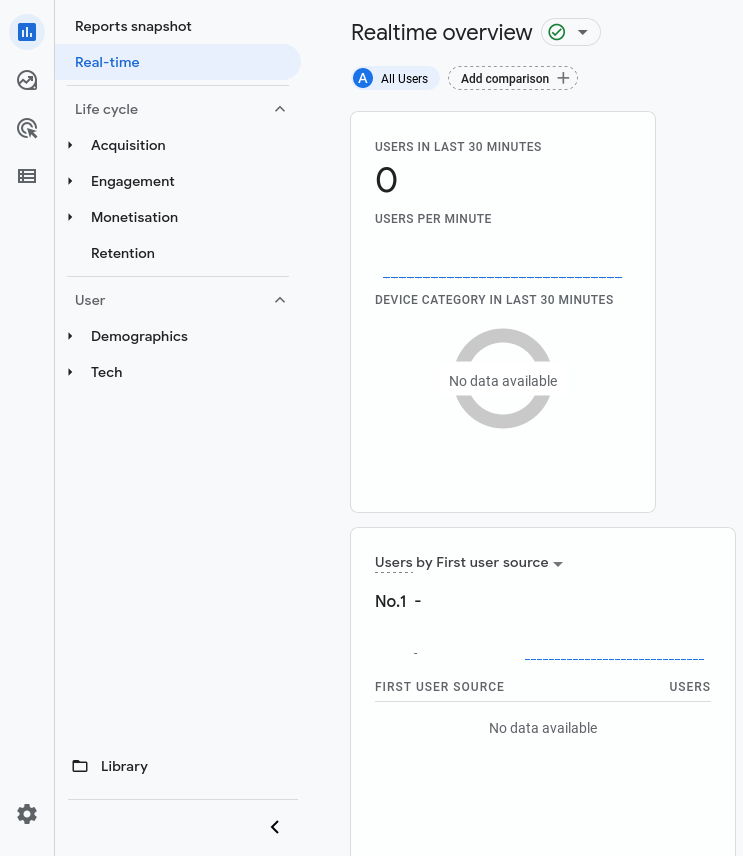
First open your Google Analytics account and navigate to the Real-time view. This will allow you to monitor real-time events on the website.
Let’s build our website to test if the plugin is working and that Google Analytics can see our website data. The plugin will only work when the website is running in production mode.
To build the production site run the following command.
gatsby build
Then run
gatsby serve
When complete, view the website in your browser. This is typically under http://localhost:9000/ but may vary according to your development environment configuration.
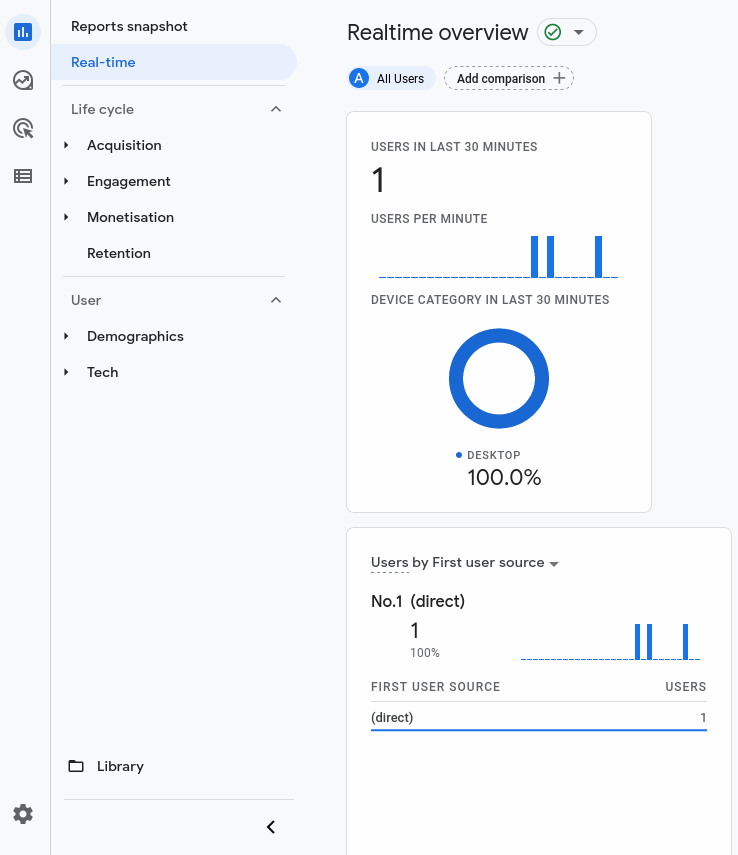
Refresh your website a few times and you should see the real-time data coming into your analytics dashboard. If you can see data it shows the gatsby Google Analytics plugin is set up correctly.
If you’re unable to see data coming in you may need to repeat the previous steps to confirm.
You can also check your website source on the browser to confirm the Google Analytics tag is included in the source which will look something like this.
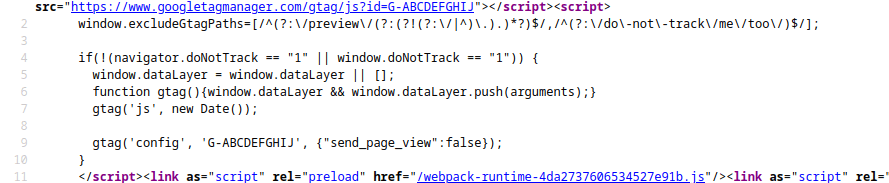
Verify the tag is present and the measurement ID is correct.
6. Configure your Measurement ID as an Environment Variable (Optional)
This step is optional but highly recommended. In step 4 we included the Google Analytics measurement ID in the Gatsby website by adding the measurement ID value directly in the gatsby-config.js source file.
However, this means your website’s unique measurement ID will be visible in the source code for the website which may be preferable to hide. For example, if your source is hosted on a public git repository it means the measurement ID will be visible to the public.
We can hide the measurement ID in the source code by using Gatsby environment variables. This allows loading of environment variables into your browser and we’ll use this to hide the ID value from our source file.
To configure an environment variable on your Gatsby website source folder create a file named “.env.production” in the same directory as the gatsby-config.js file. This will allow use of environment variables when we run the production build environment.
(For development builds the same method applies but the file should be called “.env.development”, however we need the production environment to test the Gatsby Google Analytics integration).
Add the following contents to .env.production (replacing the “G-ABCDEFGHIJ” with your actual Google Analytics measurement ID).
GA_ID="G-ABCDEFGHIJ"
The key identifier “GA_ID” will be used to represent our measurement ID value.
Now, in gatsby-config.js add the following statement to the top of the file.
require("dotenv").config({
 path: `.env.${process.env.NODE_ENV}`,
})
Also in gatsby-config.js, remove the measurement ID value that was placed in the plugin configuration for gatsby-plugin-google-gtag. Replace the value with “process.env.GA_ID” where “GA_ID” is the identifier we gave for the measurement ID in the .env.production file.
Your gatsby-config.js file should now look something like this.
require("dotenv").config({
 path: `.env.${process.env.NODE_ENV}`,
})
module.exports = {
 plugins: [
   // Insert other plugins here
   {
     resolve: `gatsby-plugin-google-gtag`,
     options: {
       // You can add multiple tracking ids and a pageview event will be fired for all of them.
       trackingIds: [
         process.env.GA_ID, // Google Analytics / GA
       ],
       // This object is used for configuration specific to this plugin
       pluginConfig: {
         // Puts tracking script in the head instead of the body
         head: true,
         // Setting this parameter is also optional
         respectDNT: true,
         // Avoids sending pageview hits from custom paths
         exclude: ["/preview/**", "/do-not-track/me/too/"],
       },
     },
   },
 ],
}
Important! The whole point of using environment variables is to hide the raw measurement ID value from your public repository. For this reason be sure to add “.env*” to your .gitignore file so any Gatsby environment variables stored in .env files are ignored and not mistakenly pushed to the public repo.
With the environment variable now configured run gatsby build && gatsby serve to test the production site locally. Test Google Analytics is still working by following step 5 again to check the real-time view on your Analytics dashboard is detecting hits to your site.
Setting up Gatsby site measurement ID with Netlify environment variables
Environment variables stored on your repository work for production build previews viewed using the localhost on your browser. But what if you’re deploying your site live on a hosting server such as Netlify?
These next steps show how to configure the environment variable for your measurement ID using Netlify.
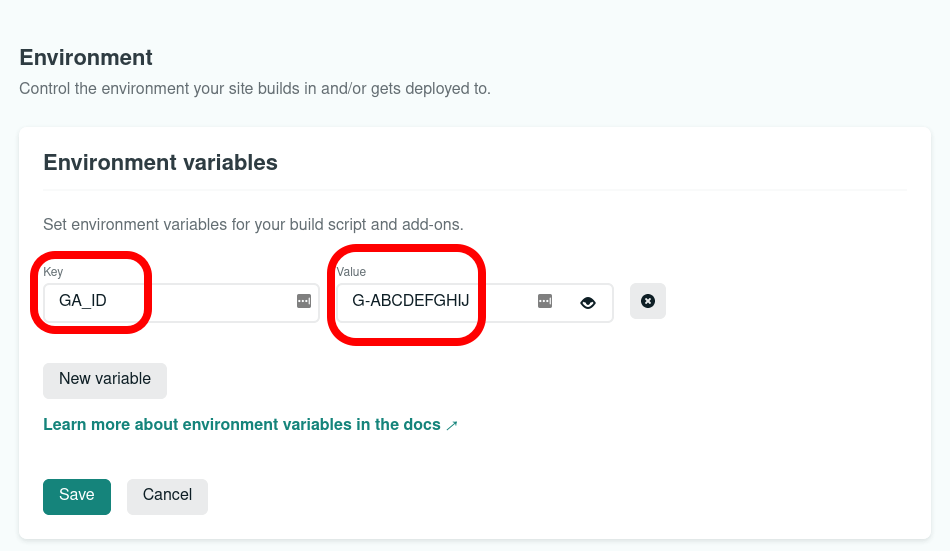
As described in the Netlify docs declare an environment variable for your website by navigating from your Netlify website’s dashboard as follows:
Site settings > Build & deploy > Environment > Environment variables
Here you can create a new environment variable. Set the key as “GA_ID” and the Value as your own measurement ID.
Example:
Build your source with the environment variable included and deploy your site to Netlify to see the Gatsby Google Analytics integration working on your live site!
This Gatsby Google Analytics guide covered all the necessary steps to get your website setup with the popular Analytics tool.
If you have any questions about the steps described in this article be sure to ask in the comments.
References that helped put this Gatsby Google Analytics guide together:
Did you find this article useful? See other articles you may be interested in: