This is a quick and easy guide on sending emails with python. You’ll learn how to send an email from your email server to any address. We’ll go through how to send emails containing plain text, HTML styled content and an image.
Send an email with Python
Step 1: Import email modules
Python contains built-in modules we can use to send emails. There are two modules we’ll need to to do this which are smtplib and email.message.
SMTP (Simple Mail Transfer Protocol) is a communication protocol used for sending emails. The python smtplib module allows us to define an SMTP client from which we can use to send emails.
The python email.message module is used for assembly of the email structure which includes the subject, address and content of the email. From the email.message module we’ll need just the EmailMessage class.
To make use of the necessary functions declare the following at the top of the python file.
import smtplib
from email.message import EmailMessage
Step 2: Configure email header fields
First, using the EmailMessage() class we’ll create an object that will hold all details of the email message.
# create an email message object
message = EmailMessage()
Next, we can add header details of the email message to specify the subject, sending address and receiving address as shown below.
email_subject = "Email test from Python"
sender_email_address = "your_email@gmail.com"
receiver_email_address = "receiver_email@address.com"

# configure email headers
message['Subject'] = email_subject
message['From'] = sender_email_address
message['To'] = receiver_email_address
Step 3: Configure email message body
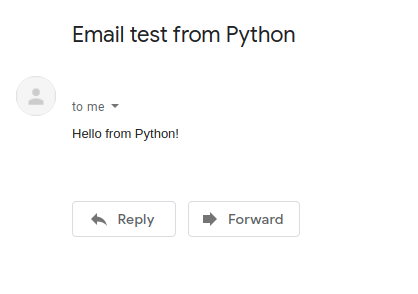
For this example, the message contents will be a plain text message. The body of the email is set using the set_content method on the email object as follows.
# set email body text
message.set_content("Hello from Python!")
Step 4: Configure email server
An email server is an application used to send and receive emails. Such servers make use of the SMTP protocol to send emails to other servers.
The server to use will depend on your email provider. For gmail the mail server is smtp.gmail.com or for hotmail this is smtp.live.com.
If you aren’t using gmail or hotmail you can search through this list of smtp email servers to find the correct server for your email provider.
In our example, we’ll say the email is being sent from a gmail account, so we need to use smtp.gmail.com as our server.
Note: By default gmail blocks access to unknown third party clients accessing your gmail account such as our python program. If you’re using gmail, for this python program to work go to your gmail account security settings and Turn on less secure app access. You can read more about this setting on the gmail support page.
Another setting we need to configure for our SMTP server is the mail port. This is the network port that will be used by our client python application to send emails to another server. We’ll use SMTP port 587, which is the default port used for handling sending of emails through SMTP. It also uses TLS encryption to ensure the email is delivered securely.
Here’s how to configure the SMTP mail server and port number. If your email account isn’t gmail you should replace the value of email_smtp with your own email account server.
email_smtp = "smtp.gmail.com"

# set smtp server and port
server = smtplib.SMTP(email_smtp, '587')
After declaring the server, we need some additional steps to make the connection to the SMTP server.
This involves identifying ourselves to the server using the function ehlo() then initiating the secure TLS connection to the server using starttls().
email_smtp = "smtp.gmail.com"

# set smtp server and port
server = smtplib.SMTP(email_smtp, '587')
# identify this client to the SMTP server
server.ehlo()
# secure the SMTP connection
server.starttls()
Step 5: Sending the email
The final step is to send the email.
First, we need to log into our email SMTP using the login function. We pass in the email address and password used when logging into our email account.
After this we can simply initiate send of the email using send_message and pass the object holding the message content we configured previously.
We finally use quit() to end the connection to the SMTP server.
sender_email_address = "your_email@gmail.com"
email_password = "your_email_password"

# login to email account
server.login(sender_email_address, email_password)
# send email
server.send_message(message)
# close connection to server
server.quit()
Step 6: Putting it all together
For completeness here’s how your python file will look like when the above code snippets are combined.
import smtplib
from email.message import EmailMessage

email_subject = "Email test from Python"
sender_email_address = "your_email@gmail.com"
receiver_email_address = "receiver_email@address.com"
email_smtp = "smtp.gmail.com"
email_password = "your_email_password"

# create an email message object
message = EmailMessage()

# configure email headers
message['Subject'] = email_subject
message['From'] = sender_email_address
message['To'] = receiver_email_address

# set email body text
message.set_content("Hello from Python!")

# set smtp server and port
server = smtplib.SMTP(email_smtp, '587')
# identify this client to the SMTP server
server.ehlo()
# secure the SMTP connection
server.starttls()

# login to email account
server.login(sender_email_address, email_password)
# send email
server.send_message(message)
# close connection to server
server.quit()
Run your python application and the receiver email address should get the message from the sender email account!
Emailing HTML content
This is to demonstrate how to configure your email body for HTML content. The email server setup procedure remains the same.
We’ll first read the contents of a file containing HTML then email the contents.
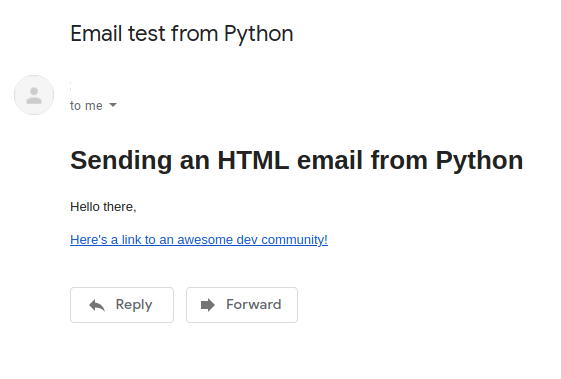
A file called message.html will contain some simple HTML, here are the contents.
<!DOCTYPE html>
<head>
</head>
   <body>
       <h1>Sending an HTML email from Python</h1>
       <p>Hello there,</p>
       <a href="https://inspirezone.tech/">Here's a link to an awesome dev community!</a>
   </body>
</html>
Our python program will first read the file contents. Then we add the contents to the message object using the set_content method as we did when setting the plain text. The only difference is we specify the content is of HTML type using the option subtype=’html’.
# create an email message object
message = EmailMessage()

# read file containing html
with open('message.html', 'r') as file:
   file_content = file.read()

# add message content as html type
message.set_content(file_content, subtype='html')
All other parts of the program remain the same. Run the python program and the receiver email address will receive the message, this time in HTML format!
Emailing an image as an attachment
This will demonstrate how to send an image attached with your email.
First we need to open the image and read it in binary format. The image we want to send as an attachment is called image.jpg

The following will read the image as binary and store it in the variable image_data.
# open image as a binary file and read the contents
with open('image.jpg', 'rb') as file:
   image_data = file.read()
To add an attachment to the email object, we use the add_attachment function and pass the image data we read in binary format.
We also need to add some options to specify the image type. Add option maintype=’image’ and also add the option subtype=imghdr.what(None, image_data).
The subtype option uses the imghdr module to determine the type of our image. To use this module we need to add an additional module import to the top of our python program.
import imghdr
The python code will look as follows to read the image data, set a plain text email body and attach the image to the email.
# create an email message object
message = EmailMessage()
# open image as a binary file and read the contents
with open('image.jpg', 'rb') as file:
image_data = file.read()
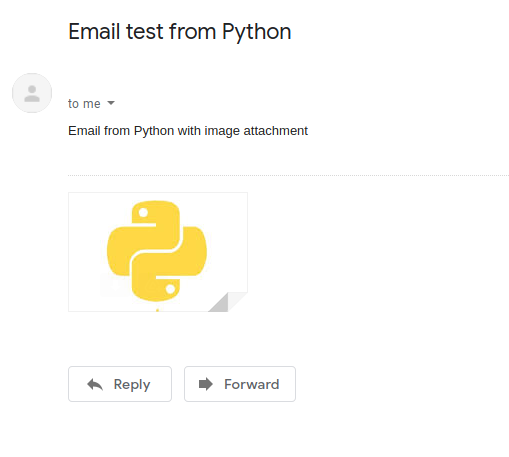
message.set_content("Email from Python with image attachment")
# attach image to email
message.add_attachment(image_data, maintype='image', subtype=imghdr.what(None, image_data))
All other parts of the program remain the same. Run the python program and the receiver email address will receive the plain text message along with the image as an attachment!
Conclusion
You are now hopefully familiar with the process of sending emails with python! Follow these step by step instructions and you should be able to run your own application to send emails to a receiving address.
If you have any questions feel free to comment below.
Also checkout our other step by step python project tutorials: