
What is a GPG key and why use it?
GPG or Gnu Privacy Guard is a cryptography implementation used to secure the transfer of data between two locations. GPG encryption techniques use libraries from the Open Pretty Good Privacy (OpenPGP) standard.
GPG keys Encryption techniques like GPG ensures data can be securely transferred by providing encryption keys in the form of a private-public key pair. The private key is used to sign the data and a public key verifies the data.
GPG keys can be set up on your GitHub account to validate git commits. This extra guard of protection will prevent your repos being compromised by ensuring each commit is verified.
If you use GitHub it is highly recommended you set up a GPG key. This especially applies if you’re working on a sensitive project that has several contributors. When a commit is successfully verified by GitHub it allows others to know the work comes from a trusted source.
If you use GitHub already you’ve likely come across SSH keys and may wonder how it differs from GPG keys?
Like SSH keys, GPG keys perform a similar purpose of securing data. However, SSH keys are used to securely transfer your git files between two places. While GPG keys are used to validate your git commits.
Related: See our introduction to git and GitHub guide and explanation of SSH keys and how they work.
This article is a step by step guide on GPG keys that will cover:
- Setting up a GPG key on GitHub to sign your commits
- Knowing when a GPG key has expired
- How to edit and renew an expired GPG key
- Some troubleshooting tips for GPG key issues
Setting up a GPG key on GitHub
Here’s an overview of how GPG keys are used to validate your git commits on GitHub.
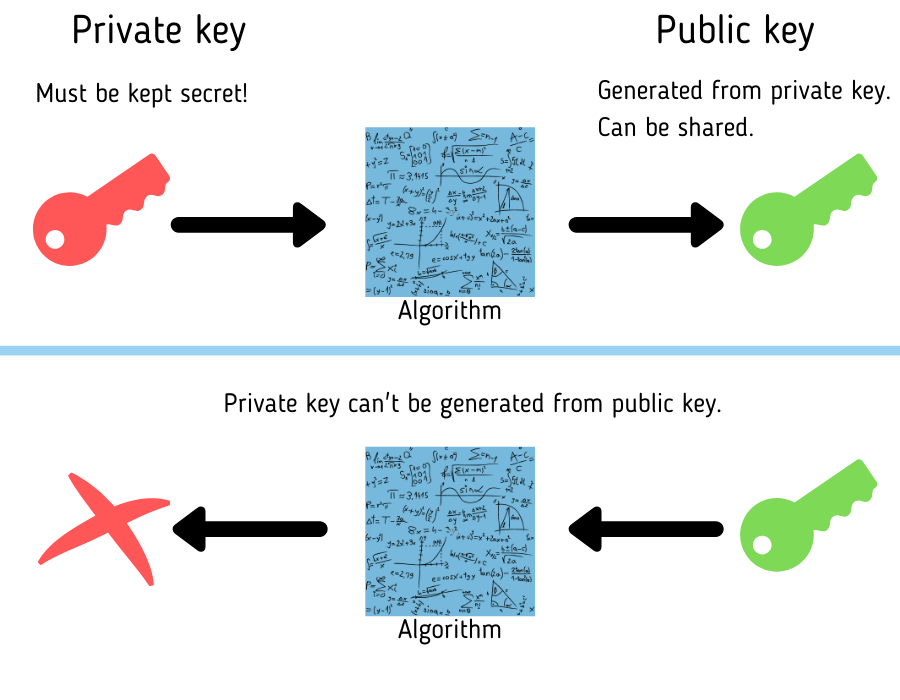
A private GPG key is generated by you and used by the git client to sign commits.
The GPG key will also have a public key which is generated from the private key and uploaded to GitHub.
You might wonder, why can be public key be shared on GitHub?
For some brief cryptography theory, a public key is derived from the private key using an algorithm generation process. This will allow the public key to be shared, and can be used to verify data signed by the private key. The private key however, must always be kept secret!
Your git client signs each commit using the GPG private key. Each commit pushed to GitHub is verified using the GPG public key.
The process of setting up GPG keys is also explained throughout various sections in the GitHub docs.
Generate a GPG key
Download GPG command line if it’s not already installed on your machine.
Confirm you have it installed by running the version check command.
gpg --version
With GPG installed, now generate a new key pair.
gpg --full-generate-key
When prompted select the default RSA key and key size of 4096.
Please select what kind of key you want:
  (1) RSA and RSA (default)
  (2) DSA and Elgamal
  (3) DSA (sign only)
  (4) RSA (sign only)
 (14) Existing key from card
Your selection? 1
RSA keys may be between 1024 and 4096 bits long.
What keysize do you want? (3072) 4096
Next, enter the length of time you want the key to be valid. We’ll select 1 year. Then confirm the settings.
Requested keysize is 4096 bits
Please specify how long the key should be valid.
        0 = key does not expire
     <n>  = key expires in n days
     <n>w = key expires in n weeks
     <n>m = key expires in n months
     <n>y = key expires in n years
Key is valid for? (0) 1y
Key expires at Sat 16 Apr 2022 21:18:10 IST
Is this correct? (y/N) y
Tip! Avoid using a key with no expiry date. For security reasons, it’s good practice to set up an expiry date. If you’re worried about dealing with expired keys just know that an expired key can be renewed. Or you can extend the expiry date of a key before it expires. How to update an expired GPG key is also covered later in this tutorial.
Next, you’ll be asked to enter some ID information.
First enter a user ID to identify your key followed by the email address you want to be associated with your commits. This email should match the same email you have configured on your git client for your commit and your configured GitHub email address.
Also add a comment describing the key and confirm your settings.
GnuPG needs to construct a user ID to identify your key.

Real name: user123
Email address: user123@address.com
Comment: my GitHub GPG key
You selected this USER-ID:
   "user123 (my GitHub GPG key) <user123@address.com>"

Change (N)ame, (C)omment, (E)mail or (O)kay/(Q)uit? O
Secure the key by entering in a passphrase as prompted.
Your key should now be generated.
Check your generated GPG key by running the command to list all your generated GPG keys.
gpg --list-secret-keys --keyid-format LONG
Identify the primary key by what follows after “sec”. In the example below the primary key ID is 0123456789ABCDEF.
sec   rsa4096/0123456789ABCDEF 2021-04-16 [SC] [expires: 2022-04-16]
     8028AB2839DC82309C9B939C0123456789ABCDEF
uid                 [ultimate] user123 (my GitHub GPG key) <user123@address.com>
ssb   rsa4096/FEDCBA9876543210 2021-04-16 [E] [expires: 2022-04-16]
Now extract the public key from the private key by running the export command and specifying the ID of the private key.
gpg --armor --export 0123456789ABCDEF
Copy all contents of the public key info:
-----BEGIN PGP PUBLIC KEY BLOCK-----
<YOUR PUBLIC KEY INFO HERE>
-----END PGP PUBLIC KEY BLOCK-----
Configure GPG key in the git client
Next, we need to tell your git client to use the generated GPG key to sign commits.
Do this by running the following git command and passing the value of the primary key ID.
git config --global user.signingkey 0123456789ABCDEF
Now every time you make a git commit it will be signed with this GPG key. When you make a commit you’ll be prompted to enter the passkey for the GPG key. Allow your git client to save the paskey if you don’t want to be asked each time.
Upload public key to GitHub
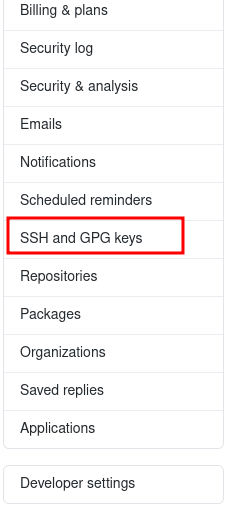
Open your GitHub settings and select SSH and GPG keys.
Select New GPG key.

Paste the entire public key block here and select Add GPG key.
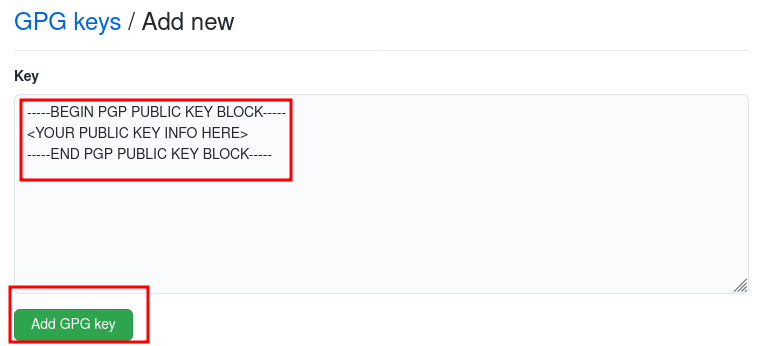
Your key is now added to GitHub.
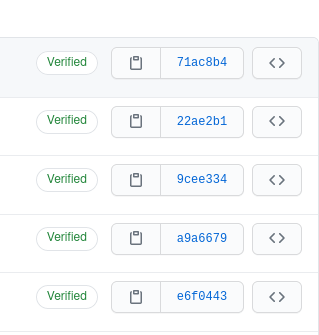
When a signed git commit is pushed to GitHub it will be verified by the public key and the commit will show as “Verified” in the commit logs. Push a commit to GitHub that was signed using your GPG key and check the commit logs.
How to know when a GPG key has expired
GPG keys may be set up to expire after a given time. Having an expiry is optional but should always be set. Otherwise, if the key is compromised the culprit will be able to manipulate it indefinitely…
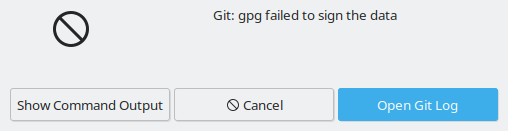
One way to tell your key has expired is the next time your git client attempts to sign a commit you will get this error or equivalent: “gpg failed to sign the data”.
Another way to tell a key is no longer valid is by checking the status of commits on GitHub that were signed using the GPG key whose public key is uploaded to your GitHub account.
If commits previously showed as “Verified” and are now showing as “Unverified” it means the GPG key was either removed from GitHub or if it’s still there, it has expired.

You can also click on the “Unverified” message on GitHub which will tell you the reason it is marked as unverified.
You can also check the expiry date of generated GPG keys on your machine at any time by running the command to list all GPG keys generated on the machine.
gpg --list-secret-keys --keyid-format LONG
This will list the key details such as the ID and the expiry date.
sec   rsa4096/0123456789ABCDEF 2021-04-16 [SC] [expires: 2022-04-16]
     8028AB2839DC82309C9B939C0123456789ABCDEF
uid                 [ultimate] user123 (my GitHub GPG key) <user123@address.com>
ssb   rsa4096/FEDCBA9876543210 2021-04-16 [E] [expires: 2022-04-16]
Now you know how to check the status of GPG keys let’s look at how to update an expired key.
Steps to updating an expired GPG key
To update an expired GPG key, according to GitHub docs you need to remove the expired public key on your GitHub account, renew the key, then upload the renewed key to GitHub.
By re-uploading the renewed key it allows GitHub to once again verify all past commits signed by that key.
WARNING!
You should NOT delete the GPG key generated on your machine and regenerate a new one to replace the expired key on GitHub.
If you choose to generate a brand new key rather than renewing the existing key, it means GitHub will be unable to verify all past commits that were signed using the expired key.
This will make all commits signed with the expired key permanently show as “Unverified”.
The only way to verify your previous commits again is to renew the key that was used to sign those commits. Not through an entirely different key.
Edit the expiry date of a GPG key with command line
To renew a key it must be edited through the GPG command line.
Note each GPG key has a primary key denoted by sec and a subkey key denoted by ssb. The primary and secondary keys may expire at different types so only one or both may have expired. In the above example both primary and secondary keys expire on the same date.
First obtain the key primary and subkey ID of the key you want to update. List all keys by running the command.
gpg --list-secret-keys --keyid-format LONG

sec   rsa4096/0123456789ABCDEF 2021-04-16 [SC] [expires: 2022-04-16]
     8028AB2839DC82309C9B939C0123456789ABCDEF
uid                 [ultimate] user123 (my GitHub GPG key) <user123@address.com>
ssb   rsa4096/FEDCBA9876543210 2021-04-16 [E] [expires: 2022-04-16]
The primary key in this case is 0123456789ABCDEF and the secondary key is FEDCBA9876543210.
Run the GPG edit command specifying the primary key ID as follows.
gpg --edit-key 0123456789ABCDEF
Following the command you’ll be in the cmd line for GPG. Now run the expire edit command to edit the expiry date for your primary key.
gpg> expire

Changing expiration time for the primary key.
Please specify how long the key should be valid.
        0 = key does not expire
     <n>  = key expires in n days
     <n>w = key expires in n weeks
     <n>m = key expires in n months
     <n>y = key expires in n years
Key is valid for? (0) 1y
Key expires at Tue 12 Apr 2022 20:28:50 IST
Is this correct? (y/N) y
Your subkey is likely to be expired close to or at the same time as the primary key.
If so you will see the following message after renewing your primary key.
gpg: WARNING: Your encryption subkey expires soon.
gpg: You may want to change its expiration date too.
To change expiry of the subkey toggle selection of the subkey using the key command followed by the key ID. In this case key 1 refers to the subkey.
gpg> key 1
Then run the expire command again, this time to edit the subkey.
gpg> expire
Changing expiration time for a subkey.
Please specify how long the key should be valid.
        0 = key does not expire
     <n>  = key expires in n days
     <n>w = key expires in n weeks
     <n>m = key expires in n months
     <n>y = key expires in n years
Key is valid for? (0) 1y
Key expires at Tue 12 Apr 2022 20:31:28 IST
Is this correct? (y/N) y
Important! You must save your changes to the key for it to apply
gpg> save
Now export the key and copy the public key block.
gpg --armour --export 0123456789ABCDEF

-----BEGIN PGP PUBLIC KEY BLOCK-----
<YOUR PUBLIC KEY INFO HERE>
-----END PGP PUBLIC KEY BLOCK-----
Full list of all edit commands on keys from the GnuPG manual page. Use these options if there are any other updates you want to make to the key such as the user ID details.
Uploading renewed GPG key to GitHub
Now on GitHub, go to the GPG key settings and delete the expired public key.
Then create a new key and paste the public key block.
Once done check a commit that became unverified when the key expired. Now it should be back to showing verified.
Troubleshooting GPG key issues
How to resolve some issues you may come across when configuring GPG keys.
Uploaded GPG key on GitHub is not verifying commits
If your commit is showing instead as “Unverified” but the key hasn’t expired, it could be a configuration mismatch of the GPG key.
You can tell why GitHub is not verifying the commit by clicking on the “Unverified” message on the commit.
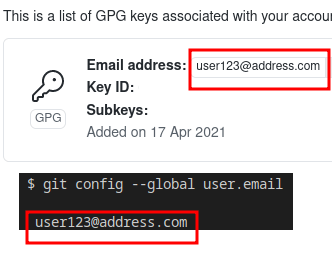
In the below example GitHub says the email used in the GPG key doesn’t match.

Remember, the email address you inputted when generating the GPG key must match the email address used in the commit.
You can check the configured email address used in your git commits by running: “git config –global user.email”
You can fix this particular issue by editing the user email ID of the GPG key. This can be done through the edit options on the GPG command line.
The adduid command can be used to add a user. The deluid command can be used to delete a user.
Adding and deleting users from GPG keys
Here’s the steps to add and delete a user on a gpg key.
Run the gpg edit key command for the key you want to edit.
gpg --edit-key 0123456789ABCDEF
Then run the adduid command. You’ll be prompted to add in details for the user. Afterwards enter “O” for Okay and you’ll be prompted for the passkey for the gpg key. Enter the passkey to add the new user.
In the below example, the user “user123” already exists on the gpg key. The steps will add a user called “newuser”
gpg> adduid
Real name: newuser
Email address: newuser@address.com
Comment: Key for newuser
You selected this USER-ID:
"newuser (Key for newuser) <newuser@address.com>"

Change (N)ame, (C)omment, (E)mail or (O)kay/(Q)uit? O

sec rsa4096/0123456789ABCDEF
created: 2021-04-16 expired: 2021-04-18 usage: SC
trust: ultimate validity: expired
ssb rsa4096/FEDCBA9876543210
created: 2021-04-16 expired: 2021-04-18 usage: E
[ expired] (1) user123 (key for user123) <user123@address.com>
[ expired] (2). newuser (Key for newuser) <newuser@address.com>
To delete the user “user123”, enter the uid command followed by the user identifier which in this case is “1” as identified by “(1) user123”.
gpg> uid 1

sec rsa4096/0123456789ABCDEF
created: 2021-04-16 expired: 2021-04-18 usage: SC
trust: ultimate validity: expired
ssb rsa4096/FEDCBA9876543210
created: 2021-04-16 expired: 2021-04-18 usage: E
[ expired] (1)* user123 (key for user123) <user123@address.com>
[ expired] (2). newuser (Key for newuser) <newuser@address.com>
Next enter the command deluid to delete the user. Confirm this when prompted. This will remove “user123” from the key.
gpg> deluid
Really remove this user ID? (y/N) y

sec rsa4096/00FDEDC9D0C73798
created: 2021-04-16 expired: 2021-04-18 usage: SC
trust: ultimate validity: expired
ssb rsa4096/C8394E20596C2281
created: 2021-04-16 expired: 2021-04-18 usage: E
[ expired] (1). newuser (Key for newuser) <newuser@address.com>
Finally, run the save command to confirm changes to the key.
gpg> save
See the GnuPG manual page for a list of all GPG edit commands.
After making any changes to your GPG key remember it needs to be exported again then uploaded to GitHub.
Conclusion
GPG keys add an extra layer of security to your GitHub accounts and software projects by providing a way of verifying all commits come from a trusted source.
We’ve covered how to generate and upload a GPG key to GitHub, how to know when a GPG has expired and how to renew an expired GPG key.
Using GPG keys are great for validating commits from multiple sources. You can also set an option to block commits that are not successfully verified by the GPG key. See instructions on GitHub docs for how to do this.
If you don’t have a GPG setup on GitHub already, now you have no excuse not to do so right away!
Did you find this article useful? See other articles you may be interested in below: